Having your own blog is an excellent way to share knowledge, showcase yourself, or develop a side business. Compared to traditional blogging platforms, static blogs are not only lightweight and secure but also allow complete control over how content is presented.
By combining Hexo and Cloudflare, you can easily set up a free and high-performance personal blog without worrying about server maintenance. This article will detail how to quickly create a blog that offers both speed and security using these two powerful tools.
Preparation Steps
Before you begin, make sure you meet the following requirements:
Install Node.js and Git using the installer packages; I won’t go into further detail here.
Install Hexo
1 | npm install -g hexo-cli |
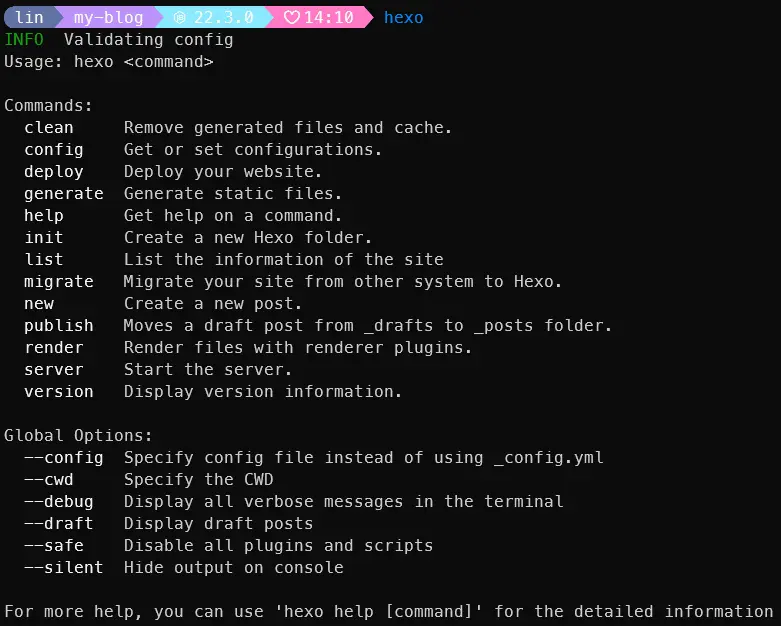
Create a Hexo Project
After confirming that Node.js, Git, and Hexo are installed, create a project using Hexo.
1 | hexo init my-blog |

After running, you can preview the site locally by entering http://localhost:4000/ in the address bar.
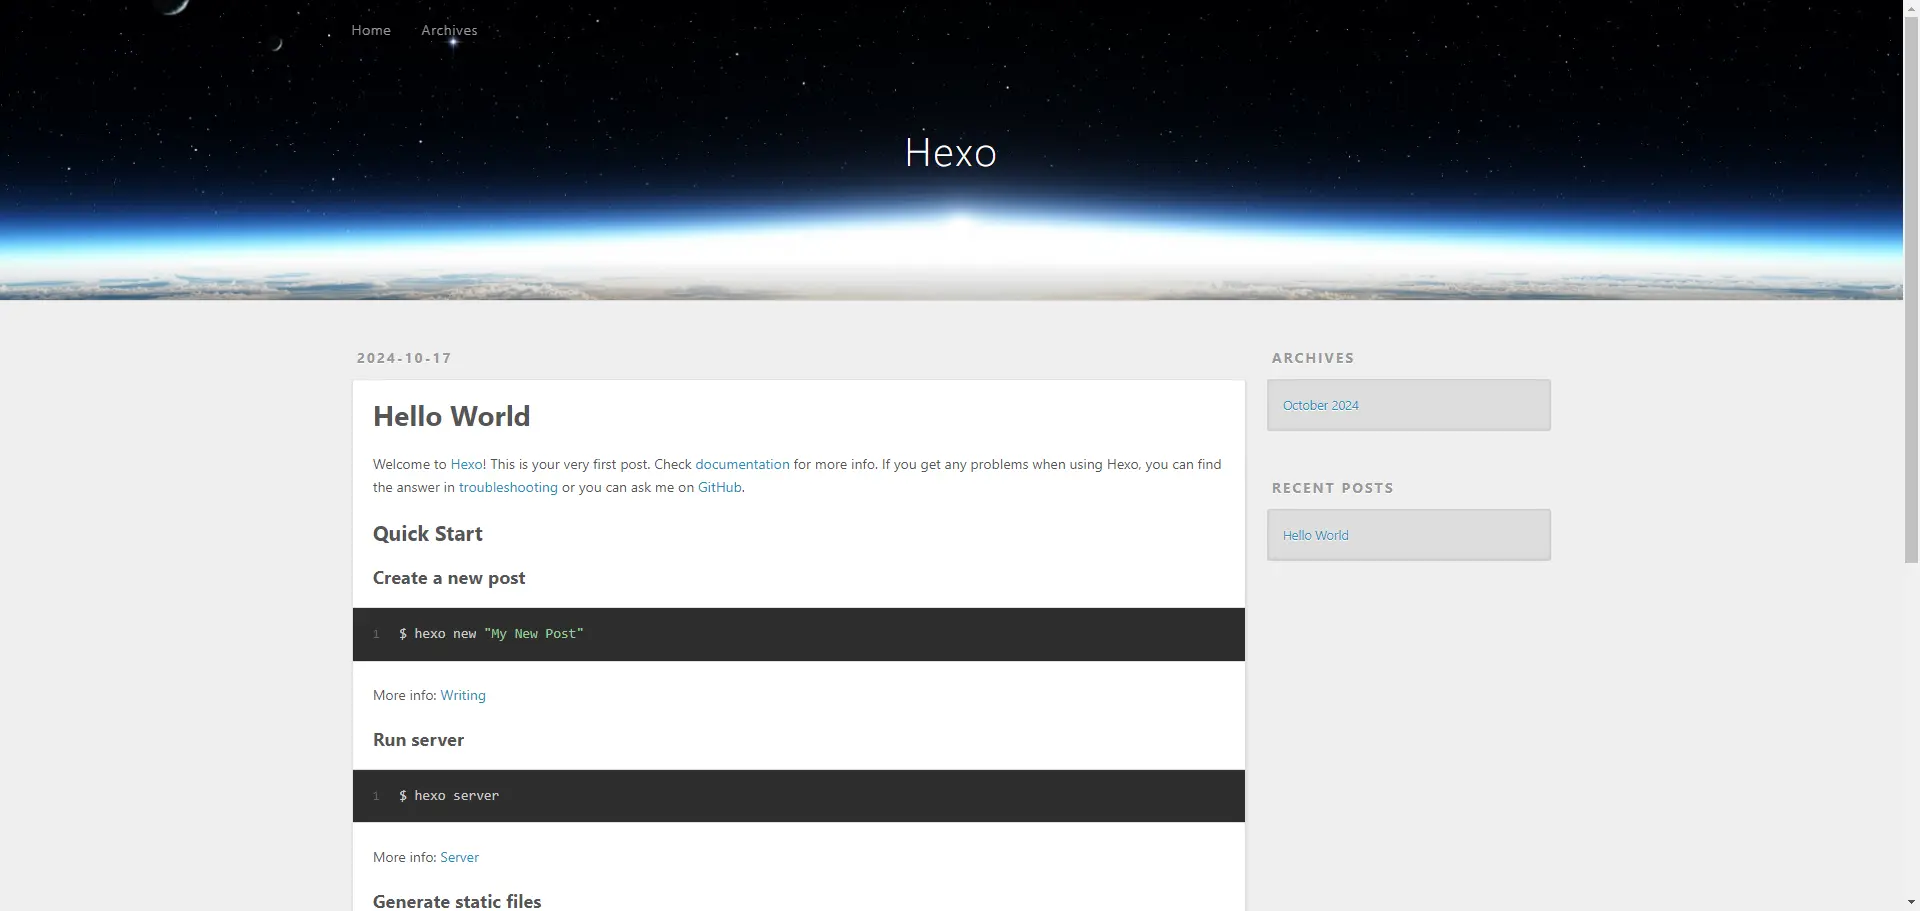
Customize Hexo Configuration
The default configuration file generated by Hexo is located at my-blog/_config.yml. You can modify parameters such as the blog title and author information as needed. To ensure your site meets SEO standards, the following points are particularly important:
- title: Blog Title
- description: A brief description that attracts users to click
- keywords: Relevant keywords to enhance search engine visibility
- url: Your blog URL
In the _config.yml file, you can set it up like this:
1 | title: my blog |
You can refer to the official documentation for other settings, themes, and plugins. Installing themes and plugins can make your blog both beautiful and functional.
Deploying Hexo Online
Free deployment options include:
- Uploading to GitHub and deploying with GitHub Pages
- Uploading to Cloudflare Pages for deployment
Websites deployed with GitHub Pages may have unstable connections in China, while using Cloudflare for acceleration requires a domain name.
Therefore, this article will focus on deploying with Cloudflare Pages for convenience and stability. This blog is deployed using this method.
In the project, build the static resource files in the public directory for use.
1 | hexo g |
Direct Upload and Deployment on Cloudflare
Open the Cloudflare Dashboard and navigate to the Workers and Pages page.
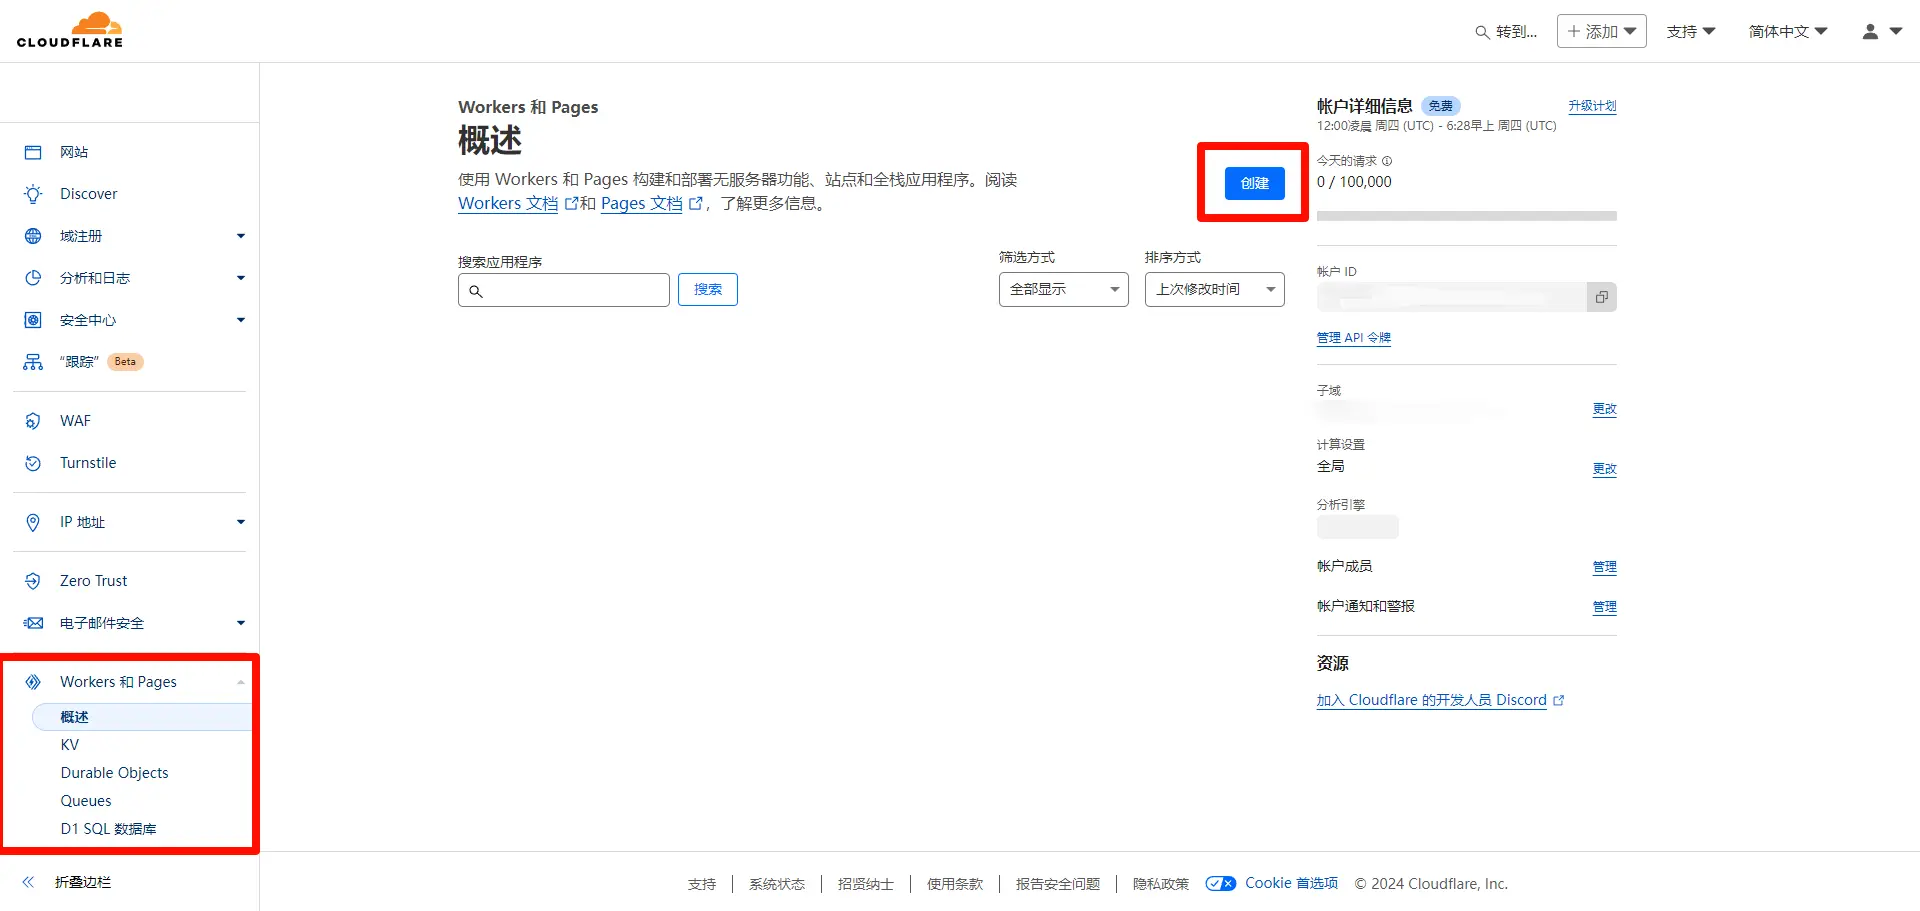
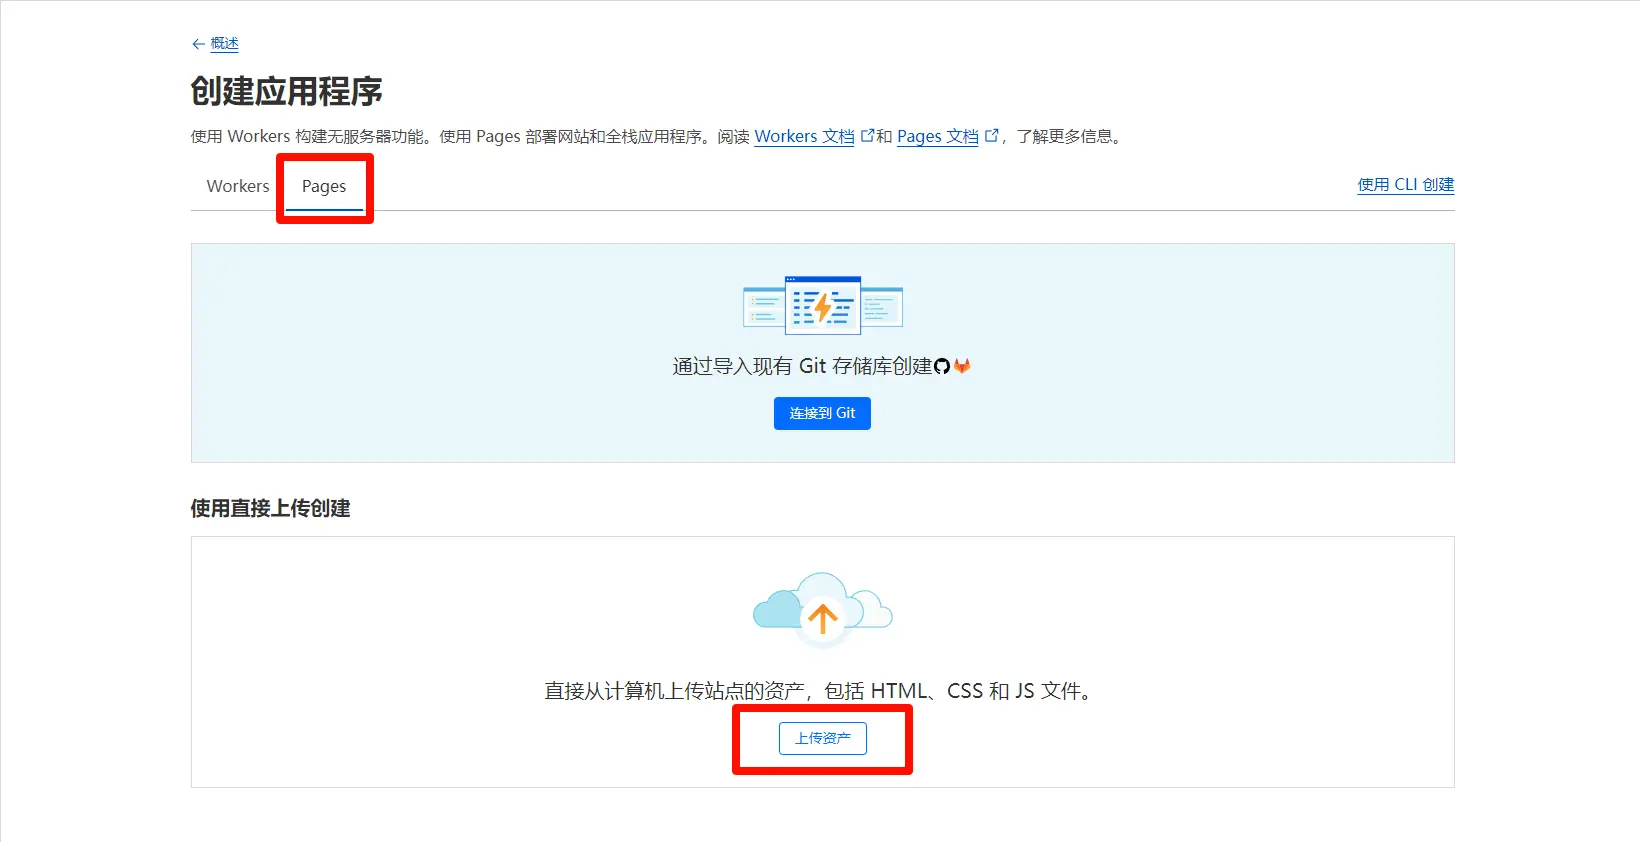
After creating a name for the project, click Create Project. Then, drag and drop the entire public folder to upload it, and click Deploy Project.
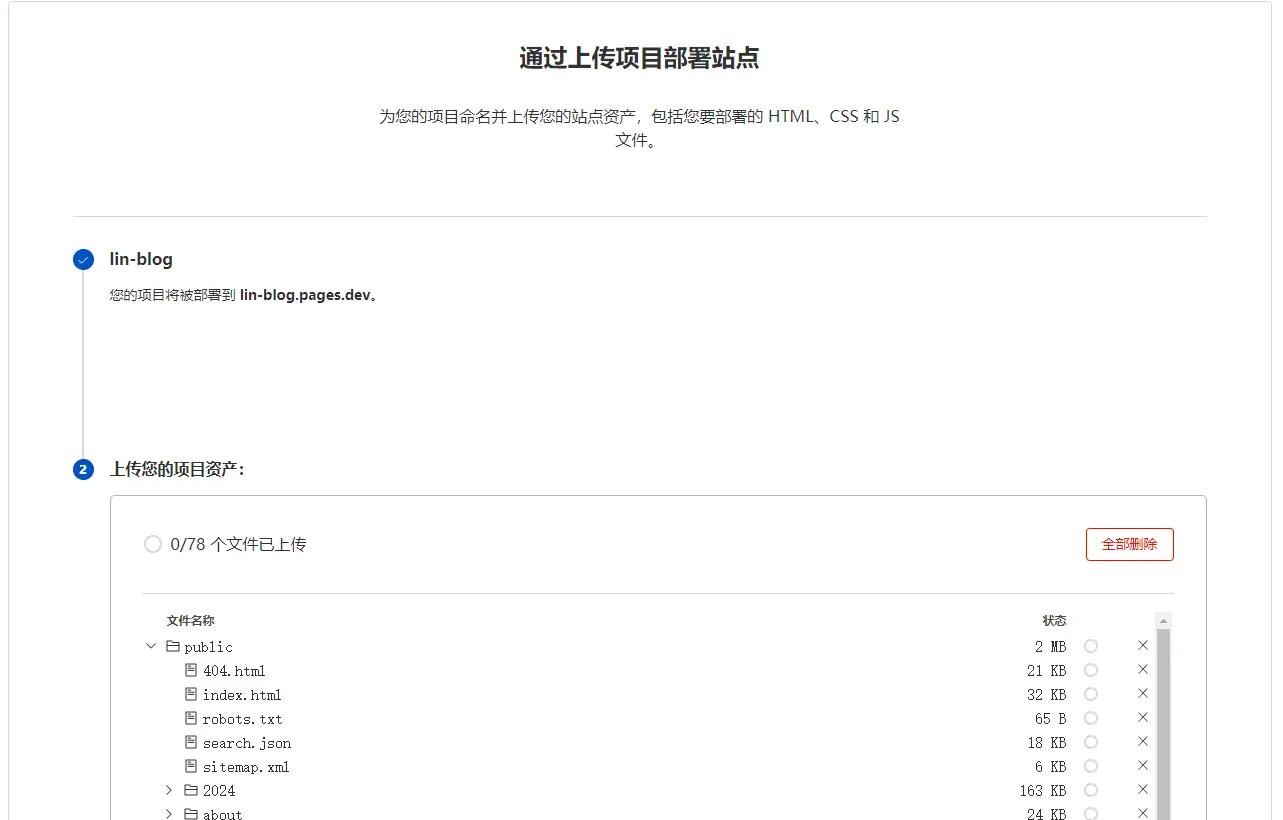

Once the deployment is successful, you can directly access your project using the provided link.
Deploying Projects Using Cloudflare CLI
C3 (create-Cloudflare-cli) is a command-line tool designed to help you quickly set up Workers and Pages applications and deploy them to Cloudflare.
Here are two methods to deploy your project to Cloudflare Pages using the CLI:
Use the command to quickly create a Cloudflare CLI project
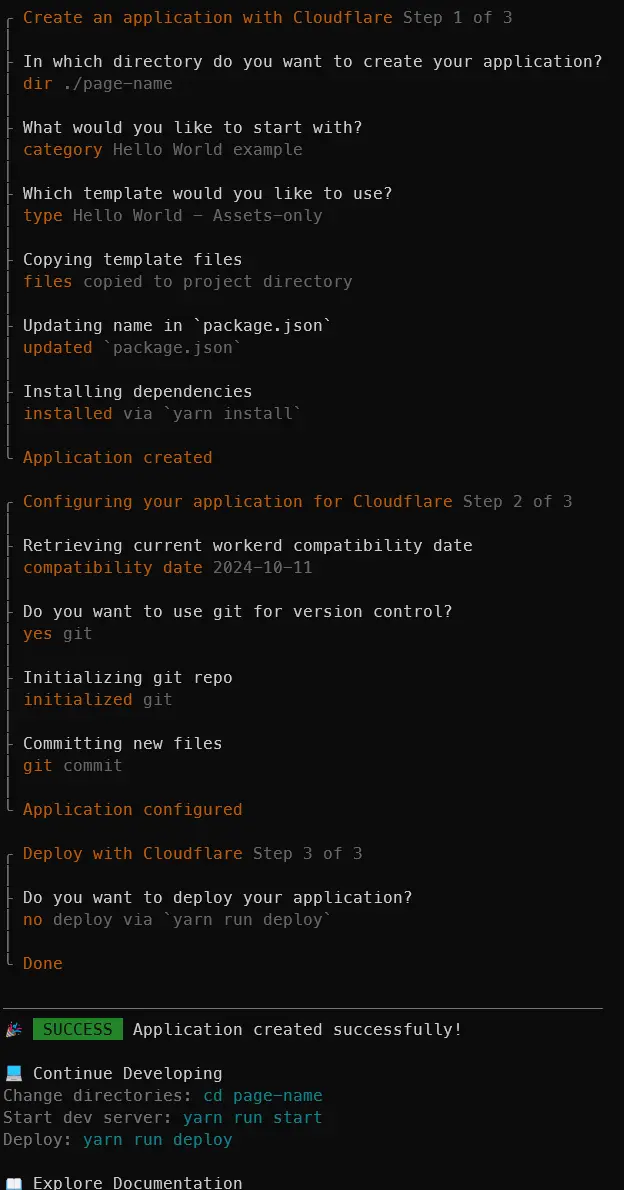
Place the Hexo static files in the public directory of the CLI project and run the command to deploy to Cloudflare.
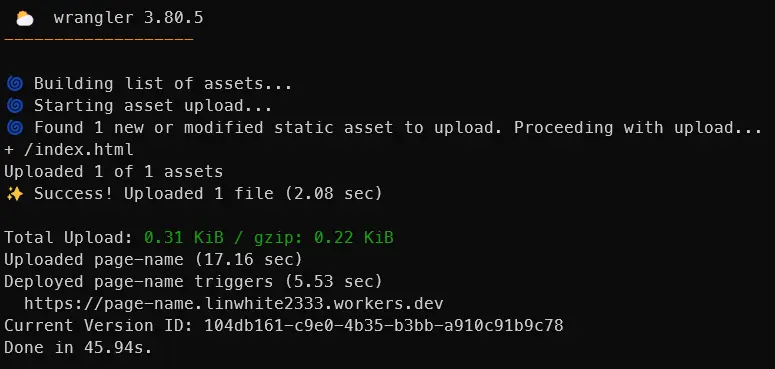
After a successful upload, you can use the link in the console to access the deployed webpage.
Add CLI to an Existing Project
Add the development dependency wrangler to the project.
Create a wrangler.toml configuration file in the project’s root directory.
1 | #:schema node_modules/wrangler/config-schema.json |
Configure the scripts section in the project’s package.json.
1 | "scripts": { |
Run the command, and you should see a message indicating a successful deployment.
If you have any questions, feel free to leave a comment so we can discuss and learn together 
If you found this article helpful, please respond with an emoji, leave a comment, or share it with more friends  Thank you
